基本介绍
现在市面上有非常多的基于 Vue 的组件库,但是看了好多都没有发现有关留言评论的组件,这对于想做一些文章信息展示类的项目可就显得棘手了,因为有太多的页面需要这个功能了,难道我们需要重复的去写(复制粘贴)这些代码吗?对于现在模块化体系逐渐完善的前端工程项目来说,一次性封装一个通用功能的组件式非常有必要的,那现在我们就去封装这样一个组件吧!
必备技术(Vue)
由于封装的组件式基于 Vue 的,所以这就要求我们需要掌握 Vue 的一些知识才行(Vue 小白建议先去官方文档阅读相关知识:grinning:),而对于有 Vue 基本功的同学可以通过封装这样一个功能完善的组件来加深对 Vue 组件化编程的理解。现在就让我们来实现这个组件的封装吧
必不可少的文本输入框
我们知道原生的 HTML 元素只有表单元素可以输入文本,但是这些元素默认情况下在不同的浏览器中渲染的样式各不相同,而且不支持输入有格式的文本,所以我们有必要用 Div 元素模拟一个具有格式化文本功能的输入框。
怎么才能使 Div 也能输入文字呢,这里就要说到一个 HTML5 的新属性"contenteditable"了。这个属性值是个布尔类型,给标签元素添加上这个属性且设置其属性值为 true 的话(默认不设置浏览器解析为 true),现在这个元素就是一个可编辑其内容的元素,用户就可以像使用表单元素一样来使用它了,现在让我们用代码来演示一下
<!-- 这里只演示主要代码 -->

<style>
.inputBox{
  border:1px solid;
  height:200px;
  width:400px;
}
</style>


<div class="inputBox" contenteditable="true">我是可以被编辑的元素</div>
页面实际的效果是这样的

至此一个可以输入文字的输入框我们就实现了,然后你还可以给它加上一些其他的样式使它更完善,这里就不在演示了。
封装输入框组件
为了更好的代码逻辑抽离以及后期的组件可维护性,我们把编辑器输入框的部分单独抽离为一个组件进行封装使用。有了前面的知识铺垫,封装这样一个组件也就很容易上手了,具体是怎么实现的我们直接看代码吧!
<!-- input-box.vue -->
<template>
  <div class>
    <div type="text" class="input-box-wrapper">
      <div
        :class="['content',{focused},type]"
        ref="richText"
        v-on="listeners"
        v-bind="$attrs"
        :contenteditable="contenteditable"
      ></div>
      <div class="append-wrapper">
        <slot name="append"></slot>
      </div>
    </div>
  </div>
</template>
<script>
export default {
  name: 'input-box',
  data() {
    return {
      contenteditable: true
    }
  },
  computed: {
    listeners() {
      return Object.assign(
        {},
        this.$listeners,
        {
          input: function(e) {
            const inputContent =
              this.contentType === 'plain'
                ? e.target.textContent
                : e.target.innerHTML
            this.$emit('input', inputContent)
          }.bind(this)
        }
      )
    }
  },
  props: {
    focused: {
      type: Boolean,
      default: false
    },
    contentType: {
      type: String,
      default: 'plain',
      validator(value) {
        return ['plain', 'rich'].includes(value)
      }
    },
    type: {
      type: String,
      default: 'text',
      validator(value) {
        return ['text', 'textarea'].includes(value)
      }
    },
    rows: Number
  },
  methods: {
    focus() {
      this.$refs.richText.focus()
    }
  }
}
</script>

<style scoped lang="less">
.input-box-wrapper {
  position: relative;

}
.content {
  max-height: 5em;
  overflow: auto;
  &::-webkit-scrollbar {
    width: 0;
  }
  &.textarea {
    min-height: 2.7em;
  }
  &.text {
    min-height: 1.2em;
  }
  &:empty:before {
    content: attr(placeholder);
    color: #ccc;
    position: absolute;
    left: 10px;
    top: 7px;
  }
  &.focused {
    border: #66b1ff 1px solid;
    cursor: text;
  }
  &:focus {
    outline: none;
  }
  border: 1px solid #ccc;
  border-radius: 3px;
  padding: 7px 10px;
  padding-right: 30px;
  position: relative;
}
.append-wrapper {
  position: absolute;
  right: 1px;
  top: 1px;
  bottom: 1px;
  display: flex;
  cursor: pointer;
  align-items: center;
}
</style>
实际的组件效果是这样的

至此一个用 Div 元素模拟后的文本输入框组件我们就做好了。
备注:完整的 input-box 组件代码来自开源项目comment-message-editor
丰富的表情符号选择器组件(:smile:)
当我们在给一篇文章或者一个评论留言的时候混合使用文字和表情符号能使我们的语言更简练,同时也更有表达力。那为什么要封装符号选择器组件呢?答案是:在日益复杂的前端工程化环境中,所有将来可被复用或者需要扩展维护的功能模块面前,我们都需要把它抽离出来,这样以后不论是更改某一处的代码还是增加新的功能我们都能够很好的去维护并提交。这里顺便也把组件的源代码贴出来共大家平时做同类型的功能时可以参考。
代码来自开源项目comment-editor
<!-- emoji-picker.vue -->

<template>
  <div
    @keyup.esc="hidePicker"
    ref="container"
    class="emoji-wrapper"
    hidefocus="true"
    v-on="handleMouse()"
  >
    <span class="emoji-button" @click.stop="togglePickerVisibility">
      <img
        :class="{inactive:!pickerVisible}"
        class="button-icon"
        src="../emoji/icon.svg"
        width="20"
        height="20"
        alt
      />
      <span v-if="buttonTextVisible" class="button-text">表情</span>
    </span>
    <ul :class="['emoji-picker',pickerPosition]" v-if="pickerVisible">
      <li v-for="(url,key) in files" :key="key" class="emoji-picker-item">
        <img class="emoji-icon" @click="handlerSelect" width="20" height="20" :src="url" alt />
      </li>
    </ul>
  </div>
</template>
<script type="text/javascript">
const path = require('path')
const requireEmoji = require.context('../emoji')
let files = requireEmoji.keys()
export default {
  data() {
    return {
      pickerVisible: false,
      files: files.map(url => require(`../emoji/${url.slice(2)}`))
    }
  },
  props: {
    buttonTextVisible: {
      type: Boolean,
      default: true
    },
    triggerPick: {
      tyep: String,
      default: 'hover',
      validator(value) {
        return ['hover', 'click'].includes(value)
      }
    },
    pickerPosition: {
      type: String,
      default: 'right',
      validator(value) {
        return ['left', 'middle', 'right'].includes(value)
      }
    }
  },
  watch: {
    pickerVisible(newValue) {
      newValue ? this.$emit('activated') : this.$emit('inactivated')
    }
  },
  mounted() {
    const docHandleClick = (this.docHandleClick = e => {
      if (!this.$refs.container.contains(e.target)) {
        this.hidePicker()
      }
    })
    const handleKeyup = (this.handleKeyup = e => {
      if (e.key === 'Escape') {
        this.hidePicker()
      }
    })
    document.addEventListener('click', docHandleClick)
    document.addEventListener('keyup', handleKeyup)
  },
  destroyed() {
    document.removeEventListener('click', this.docHandleClick)
    document.removeEventListener('click', this.handleKeyup)
  },
  methods: {
    handlerSelect(e) {
      this.$emit('selected', e)
    },
    hidePicker() {
      this.pickerVisible = false
    },
    togglePickerVisibility() {
      if (this.triggerPick === 'click') {
        this.pickerVisible = !this.pickerVisible
      }
    },
    handleMouse() {
      const mouseenter = function() {
        this.pickerVisible = true
      }.bind(this)
      const mouseleave = function() {
        this.pickerVisible = false
      }.bind(this)
      if (this.triggerPick === 'hover') {
        return {
          mouseenter,
          mouseleave
        }
      } else {
        return {}
      }
    }
  }
}
</script>
<style scoped >
ul,
li {
  list-style: none;
  margin: 0;
}
</style>

<style scoped lang="less">
.emoji-picker {
  display: flex;
  flex-wrap: wrap;
  width: 300px;
}
.emoji-picker-item {
  margin: 4px;
  cursor: pointer;
  img {
    user-select: none;
  }
}
.emoji-wrapper {
  position: relative;
  display: inline-block;
  z-index: 10000;
}
.emoji-button {
  font-size: 14px;
  cursor: pointer;
  user-select: none;
  .button-icon {
    &.inactive {
      filter: grayscale(100%);
    }
  }
  &:hover {
    color: #027fff;
  }
  .button-text {
    vertical-align: super;
  }
}
.emoji-picker {
  background: #fff;
  box-shadow: #ccc 1px 1px 7px;
  border-radius: 5px;
  padding: 10px;
  display: flex;
  position: absolute;
  &.left {
    right: 0;
  }
  &.middle {
    left: 50%;
    transform: translateX(-50%);
  }
}
</style>
组装编辑器入口组件
我们有了输入框组件和表情符号选择器组件,接下来只要把他们按一定的使用方式组合起来,我们的评论编辑器组件就大功告成了。废话不多说让我们看代码吧
源代码来自开源项目comment-message-editor
<!-- main.vue -->

<template>
  <div class="comment-editor" ref="container">
    <div class="input-wrapper" :class="{inline}">
      <input-box
        ref="inputBox"
        :type="inline?'text':'textarea'"
        content-type="rich"
        :rows="2"
        @focus="onInputFocus"
        @blur="onInputBlur"
        @keyup.enter.ctrl.exact.native="handlerSubmit"
        v-model="inputContent"
        :placeholder="'placeholder'"
        :focused="showInlineButton"
        class="input-box"
      >
        <div v-if="inline" :class="['input-append',{hasbg:!showInlineButton}]" slot="append">
          <emoji-picker
            ref="emojiPicker"
            trigger-pick="click"
            @activated="inputBoxFocused=true"
            @selected="handlerEmojiSelected"
            picker-position="left"
            :button-text-visible="false"
          ></emoji-picker>
        </div>
      </input-box>
      <transition name="button" >
        <div
          @click="handlerSubmit"
          class="submit-button inline"
          :disabled="!inputContent"
          ref="button"
          v-show="showInlineButton && inline"
        >{{buttonText}}</div>
      </transition>
    </div>
    <div class="footer-action" v-if="!inline">
      <emoji-picker
        trigger-pick="click"
        @activated="$refs.inputBox.focus()"
        @selected="handlerEmojiSelected"
      ></emoji-picker>
      <span class="submit-tiptext">Ctrl + Enter</span>
      <div @click="handlerSubmit" class="submit-button" :disabled="!inputContent">{{buttonText}}</div>
    </div>
  </div>
</template>
<script>
import InputBox from './components/input-box'
import EmojiPicker from './components/emoji-picker'
export default {
  name: 'comment-editor',
  components: { InputBox, EmojiPicker },
  data() {
    return {
      active: false,
      inputContent: '',
      inputBoxFocused: false
    }
  },
  props: {
    buttonText: {
      type: String,
      default: '提交'
    },
    inline: {
      type: Boolean,
      default: false
    }
  },
  computed: {
    showInlineButton() {
      return !!(this.inputBoxFocused || this.inputContent)
    }
  },
  destroyed() {
    document.removeEventListener('click', this.hideButton)
  },
  mounted() {
    document.addEventListener('click', this.hideButton)
  },
  methods: {
    focus(){
      this.$refs.inputBox.focus()
    },
    hideButton(e) {
      if (this.$refs.container.contains(e.target)) {
        return
      }
      if (!this.$refs.container.contains(e.target)) {
        this.inputBoxFocused = false
      }
    },
    onInputFocus(e) {
      this.inputBoxFocused = true
    },
    onInputBlur(e) {
      if (this.$refs.container.contains(e.target)) {
        return
      }
      this.inputBoxFocused = false
    },
    handlerSubmit(e) {
      if (e.target.hasAttribute('disabled')) {
        return
      }
      this.$emit('submit', this.inputContent)
    },
    handlerEmojiSelected(e) {
      this.$refs.inputBox.focus()
      const clonedNode = e.target.cloneNode(true)
      clonedNode.style.verticalAlign = 'text-top'
      document.execCommand('insertHTML', false, clonedNode.outerHTML)
    }
  }
}
</script>

<style scoped lang="less">
.input-wrapper {
  &.inline {
    display: flex;
    .input-box {
      flex: 1;
      margin-right: 14px;
    }
  }
  .input-append {
    width: 30px;
    height: 100%;
    display: flex;
    align-items: flex-end;
    justify-content: center;
    &.hasbg {
      background: #eee;
    }
  }
}
.footer-action {
  margin-top: 10px;
  display: flex;
  align-items: center;
}
.submit-tiptext {
  margin-left: auto;
  margin-right: 4px;
  font-size: 14px;
  color: #ccc;
}
.submit-button {
  align-self:flex-end;
  transition:all 0.2s;
  background: #409eff;
  border-radius: 4px;
  display: inline-block;
  cursor: pointer;
  padding: 6px 10px;
  color: white;
  user-select: none;
&.button-enter,&.button-leave-to{
  // zoom:0;
  margin-left:-40px;
  transform:scale(0,0)
}
  &[disabled] {
    cursor: not-allowed;
    background: #66b1ff;
  }
  &:hover {
    background: #66b1ff;
  }
  &:not([disabled]):active {
    background: #3a8ee6;
  }
}
</style>
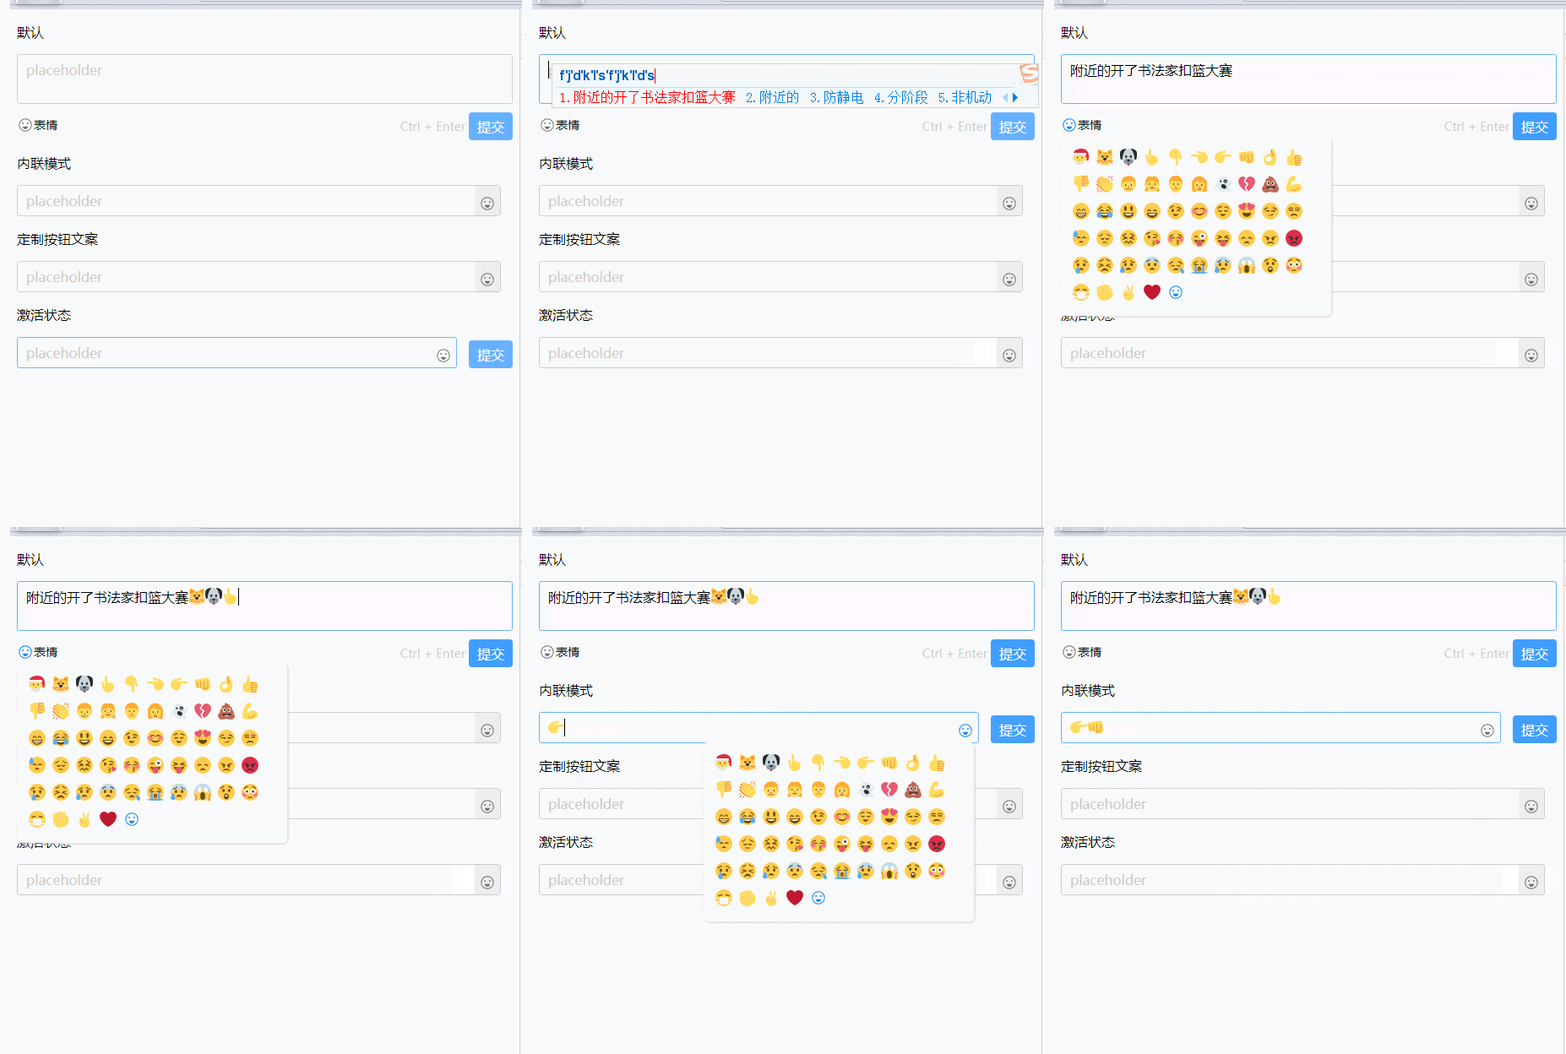
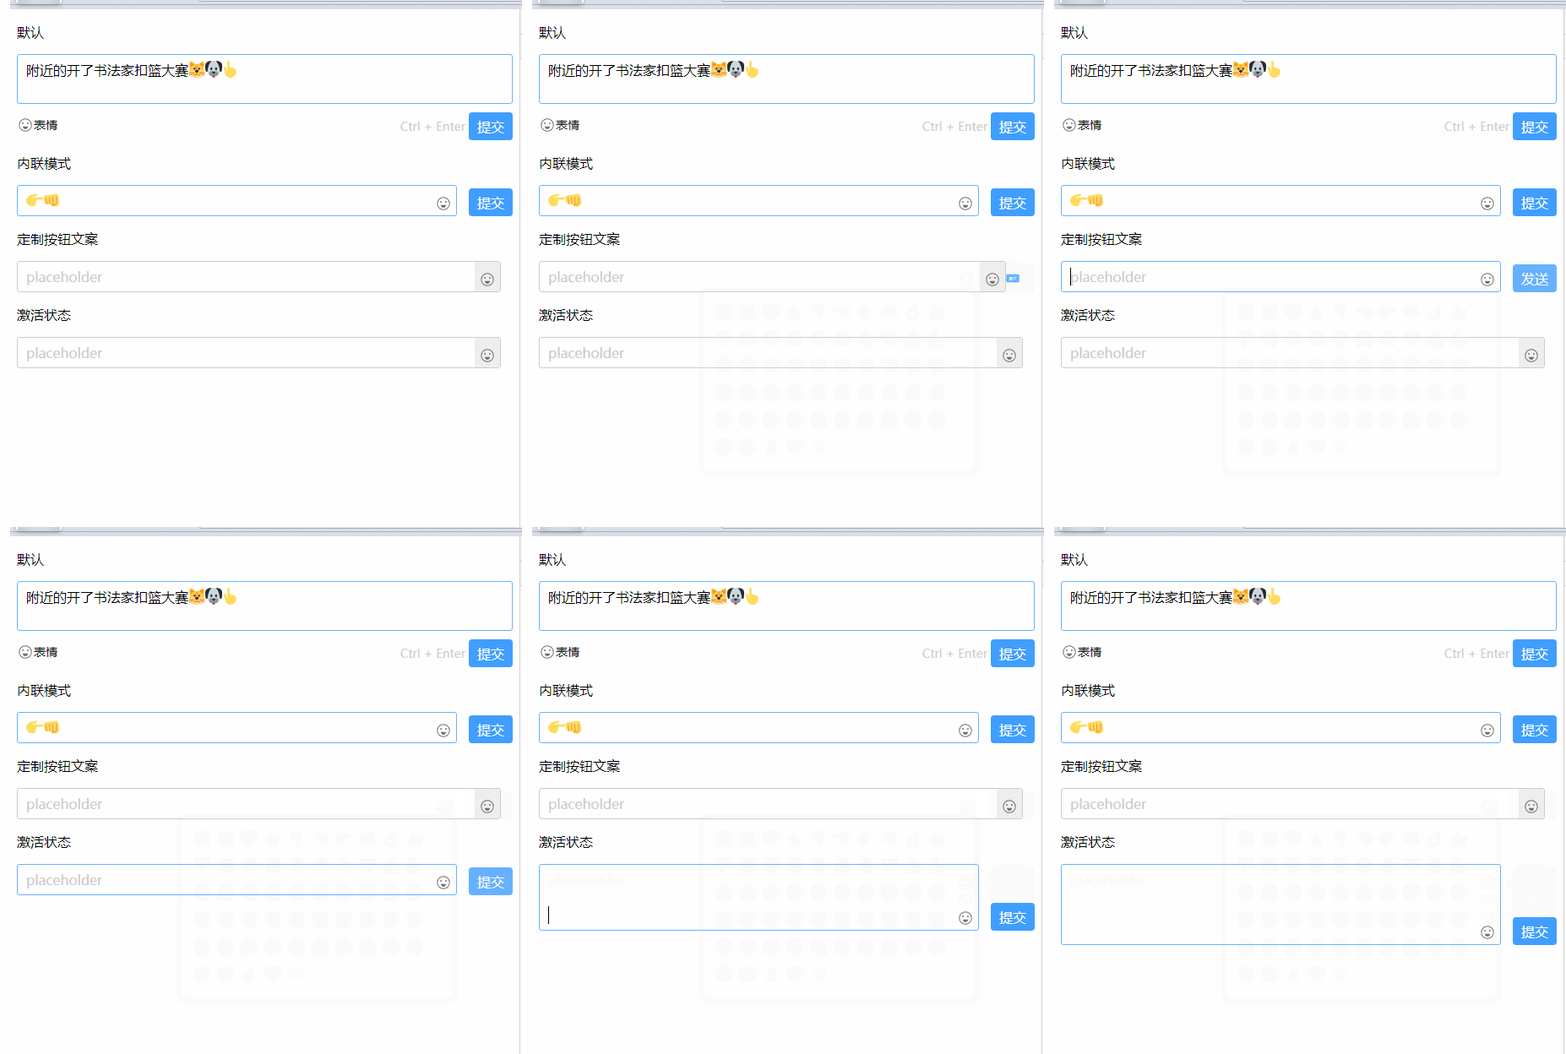
组件效果预览


文章最后附上本项目的仓库地址
备注:本文属于作者原创,转载请注明出处,谢谢!
作者:孔令文